

I created this interactive sensory Haggadah template so that parents and teachers can craft a unique Haggadah for the youngest children too! You can find my paper seder plate craft here. This post contains affiliate links.
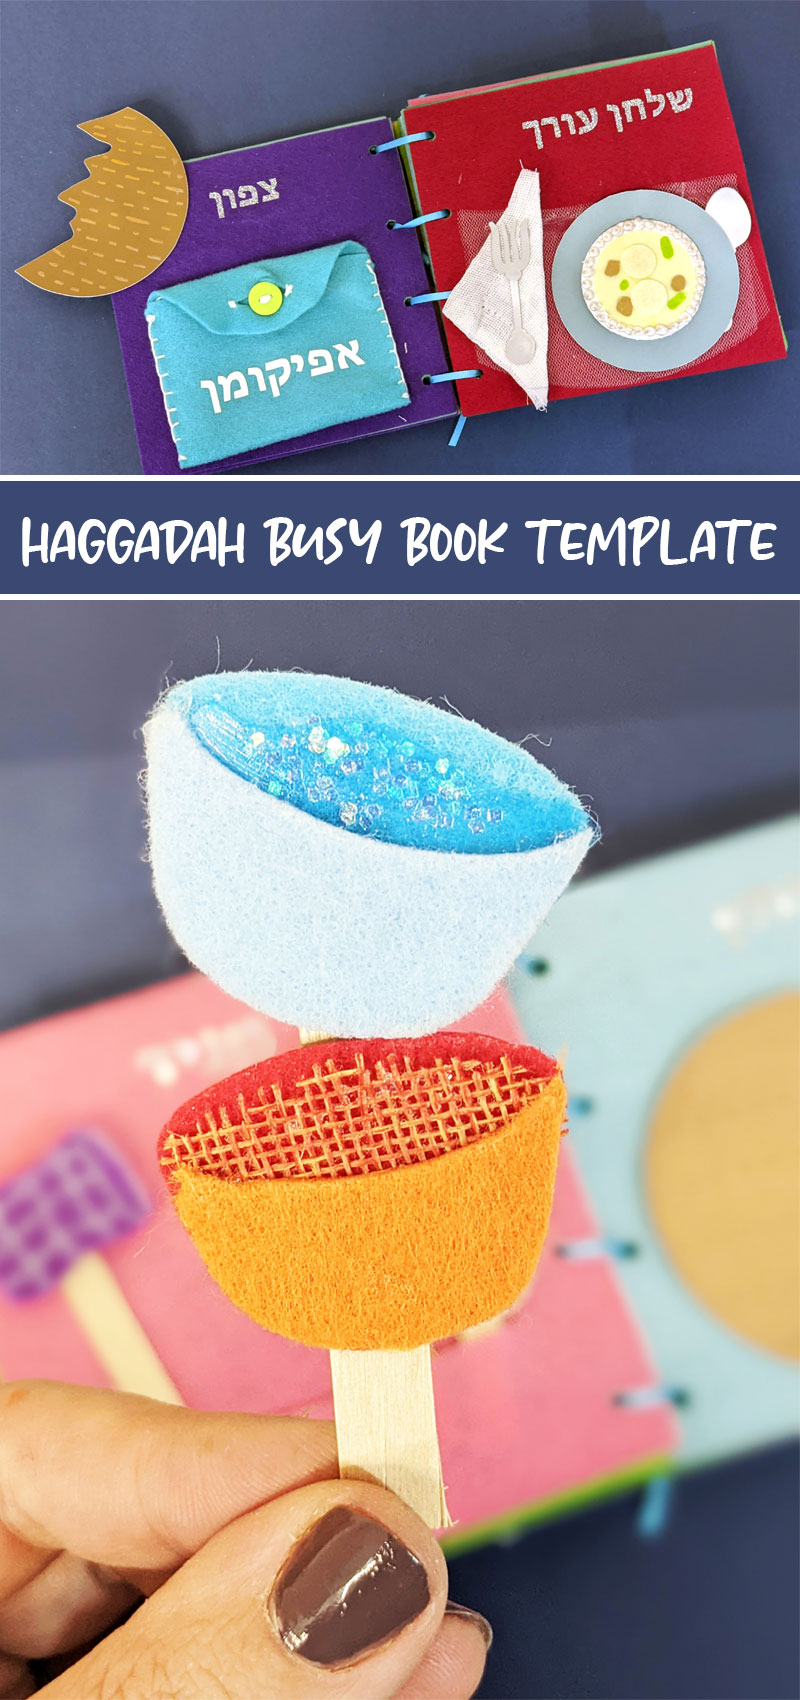
Craft your own interactive sensory Haggadah for Passover! I’m super excited to finally be sharing this super fun sensory Haggadah template in both SVG (Cricut or other dye cutting machine) and PDF (hand cutting) formats. For me, it was a project three seasons in the making due to life changes, 2020, and a new baby getting in the way.
An interactive felt Haggadah is something that you can really take pride in and pass on from generation to generation. How appropriate for Pesach!
You can put as much or as little as you’d like into creating this Haggadah.
You can create fully interactive pages or focus on textures.
You can work on it page by page or consolidate your colors.
You can even make single moving parts – a matzah that breaks in yachatz with half moving to motzi matzah and the other half being hidden as an afikoman.
And yes, if you make the afikoman bag removable, the kids can actually hide it.
I just love it!
This sensory Haggadah template was designed to be a felt quiet book style, for parents, grandparents, or teachers to make once as a keepsake. However, it can be done in paper and created page-by-page as class projects. You just might want to make some modifications to make it work for you.
- How this sensory Haggadah template came to be
- Get the Haggadah Template
- Tips for assembling this Sensory Haggadah template
- Cutting the Haggadah template by hand
- Cutting the Haggadah template with a cutting machine
- What you’ll need to assemble a sensory Haggadah for kids
- Page by Page Preview of the Sensory Haggadah template
- Putting it all together
How this sensory Haggadah template came to be
About six years ago, when my oldest was two, I created a sensory Haggadah for him. Let’s just say that I “winged it”. You can still see how I made that sensory Haggadah here.
I found different textures and materials from around the house and made him a hacked together but totally adorable little book to use.
Since it was constructed on a whim, it did fall apart.
However, two years ago, I decided that I’d really love to recreate one for my second son – then a young preschooler – but this time do it right. I had just gotten my first Cricut cutting machine and wanted to create a template so that others can recreate it for themselves.
And so, this sensory Haggadah came to be.
This time, I made it much more interactive, with moving parts and accessories, so that kids can truly pretend to throw their own seder with this little book.
However, shortly after I started planning it, during 2020, life went haywire. And then school was canceled and a week later I found out that I was expecting my third child. The next thing I knew I was actually making Passover for the first time, while hardly having enough energy to stand, with the kids home all day… I need not outline all the details of the dysfunction of our particular situation.
Miraculously, I managed to finish creating the template. However, I knew that I had to actually create the Haggadah before I can share the template with the world.
And so it got postponed for the next year. Only the next year, I had a baby, was making Passover again – and then was moving a week after. And so I got two pages done.
This year, I was blessed with a wonderful craft room where I was able to spread out and dedicate my time to it and I am thrilled that it is complete. Because it’s better than I imagined.
In this post , I’ll be showing you a fun glimpse into every page that I created – both the preview of the SVG version and the page that I made based on it, since I do encourage adding your own detail.
I did add some detail as you can see this was a passion project, and I wanted to do a lot. This might seem ambitious for some crafters, however, you can definitely simplify it.
You can see a full list of recommended and suggested supplies here, but I also share a supplies list in this post. Please note: you do receive a printable (and more detailed) version of this post when you purchase your template. This is just meant to be a pre-purchase preview. So you do not need to worry about bookmarking this!
Get the Haggadah Template
Purchase the full 15-page (including the cover) Haggadah template below. You get:
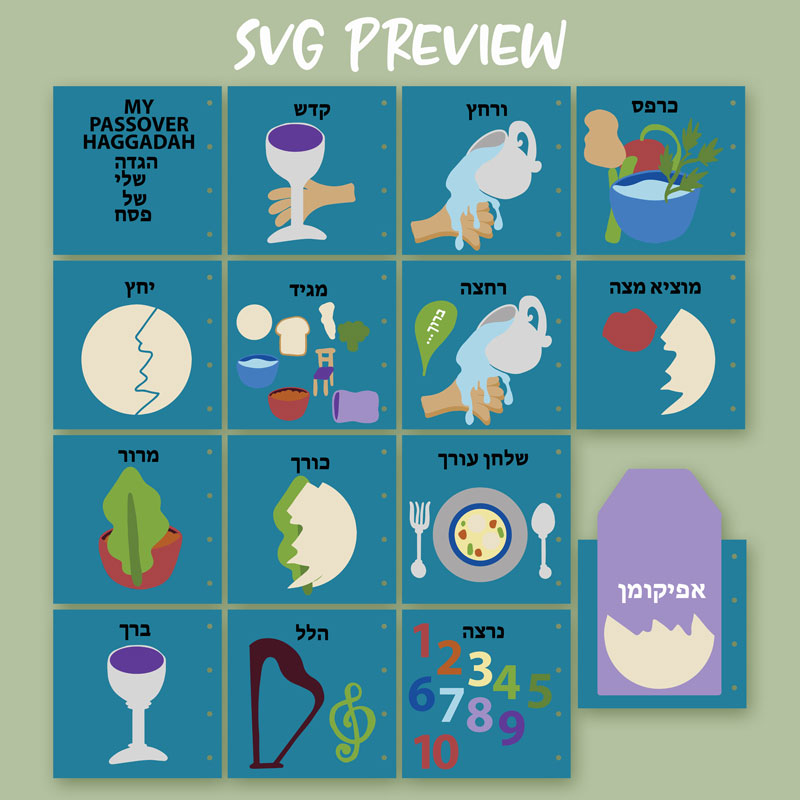
- A (zipped) SVG template with all the elements you need in one SVG file for easy uploading. Enable/disable layers as needed.
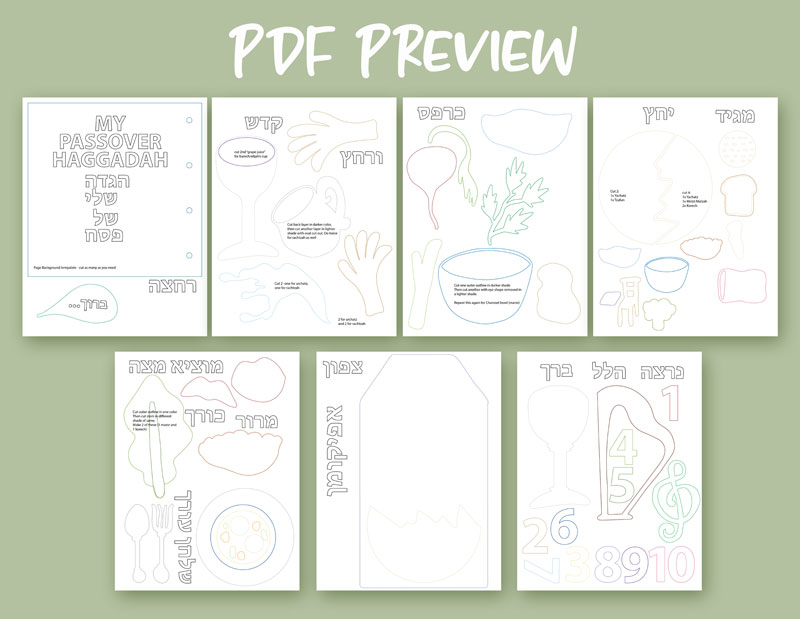
- A 7-page PDF template with the elements consolidated as much as possible for you to print on cardstock and trace as many times as you need.
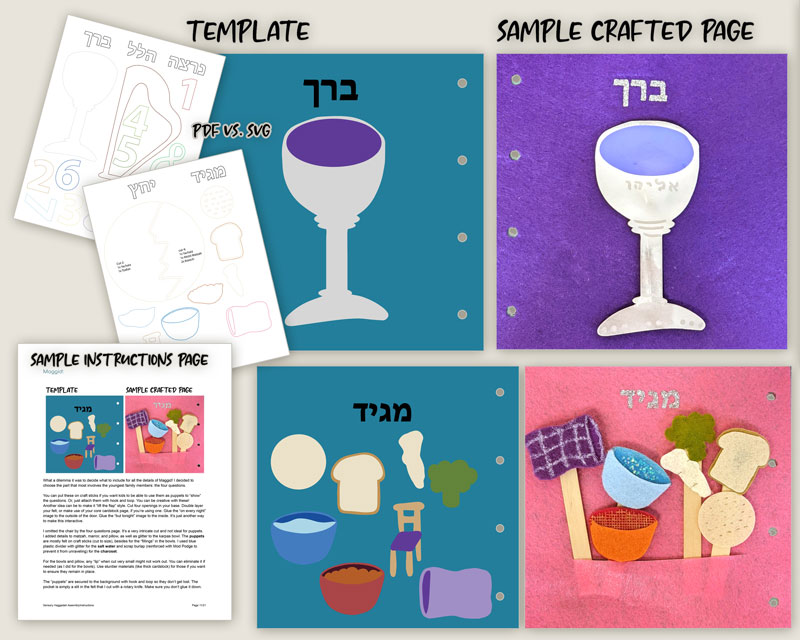
- A 21-page PDF with instructions as well as a side-by-side view of the (SVG because it’s clearer) template and the page that I personally created. It includes alternate ideas, a materials list, and a link to an Amazon materials list. It also includes a link to the preview video embedded in this post.
Here’s a preview of what it looks like:
Tips for assembling this Sensory Haggadah template
This is a large and ambitious project. I worked with a specific system, however, I recommend that you do what works best for you.
The ideal page setup will vary by whether you are hand cutting or machine cutting. If you’re hand cutting, you may want to leave out the on-page letters entirely, or write them in. You can use puffy fabric paint to do this.
I recommend cutting one page at a time and considering each one a standalone project, as people do with quiet books, even though this is a simpler take on the more elaborate quiet book.
First, cut your backgrounds. Each page was given one background but I would cut an additional cardboard for every other page if using felt backgrounds. This way you get a stiff page. I assembled each one on an individual felt page, rotating the direction of the felt so that it can go back to back. I then placed a cardstock page between them.
I assembled the pages individually and only glued them together when the entire Haggadah was ready. Be careful when assembling your pages that it’s right side up, that the holes will line up.
You may find it easier to plan your entire book in advance, but for me, doing each page, deciding materials as I went along worked better. It reduced a lot of the overwhelm that a project of this scale can cause.
The basic process was as follows:
- Cut a background for each page plus covers and any bonus pages (for example, I have a separate seder plate template in my Etsy shop).
- Cut a cardstock for every other page.
- Cut all my letters at once, weed, and prep them.
- Prepare the page parts.
- Assemble the page details.
- Iron on the letters.
- Glue the felts back to back with a cardstock in between.Or, if you’re making it one sided cut a cardstock for each page and glue felt to one side.
- Finally, I threaded a ribbon through each of the holes and tied a bow. I glued the bow in place.
Cutting the Haggadah template by hand
If you’re cutting this by hand, you’ll want to print out the PDF template. I recommend printing on cardstock and using an erasable pen to trace – preferably a heat-deactivated one to make it easier.
To consolidate printing and template cutting, I combined the elements into seven pages. That means that you cut one background, one washing cup, etc. Then trace that as many times as you need it.
The template includes some pertinent instructions on it too.
The lettering can be complex. You can use my guide and just purchase Hebrew alphabet stickers or stencils.
You can omit the lettering for specific pages.
If you’d like to use my template, you may wish to explore different transfer methods and then trace it with a paint pen, fabric paint, or something similar.
Cutting the Haggadah template with a cutting machine
I’ve included this entire project as one SVG file to save you time on uploading.
You’ll probably want to go through it before cutting. You might want to enable or disable some layers, group some, and even add in your own details and shapes!
Some pages have options – all options are “visible” or enabled on your SVG file. Some of these options are redundant so disable any that you don’t need. I didn’t necessarily do this. For example, you’ll see below that instead of choosing one vegetable for karpas, I did all four! I do think you’re better off choosing one.
Change colors as you’d like to design your own based on my template, duplicate elements to make “copies”. If you would like to, you can “color sync” the various pages to consolidate the cutting process. I did not do this, as I mentioned, as I operated page-by-page and went all out with texture.
Disable any layers you don’t want to use, ungroup any that you’re changing. And of course, make the design bigger or smaller as you’d like it. But make sure everything fits properly on your page.
I recommend using iron on or adhesive vinyl for the letters. I started it with glitter cardstock but finished with iron-on as it was too complicated and messy to glue. This way, you can also consolidate and do it all at once.
The printable instructions includes some material-specific cutting instructions.
For best results and to save time, start with clean mats.
What you’ll need to assemble a sensory Haggadah for kids
Check out an easy list of potential and suggested supplies you can use here.
For the Pages
- Stiff felt
- Recommended: cardstock
For the Words
- I used glitter iron-on
- Other options: card stock, markers, permanent vinyl
For the Elements
Explore and use items you have handy!
A good “toolkit” can include:
- Different colors of felt
- Cardstock
- Something to use for matzah (matzah print cardstock, Kraft board, tan felt, etc)
- Transparent plastic dividers (for liquids: water, soup, grape juice)
- Something silver (such as foil poster board)
Cool to have:
- Acrylic paints
- Paint markers for adding details
- Glitter (or glitter paint)
- Mod podge (to prevent fraying on fabrics)
- Fabric scraps
To assemble it
- Hot glue gun
- Hook and loop (such as Velcro) dots
- Mini brads
To Bind it
- Ribbon
- A large needle
- OR binder rings
- Zip ties may work too
Page by Page Preview of the Sensory Haggadah template
Cover
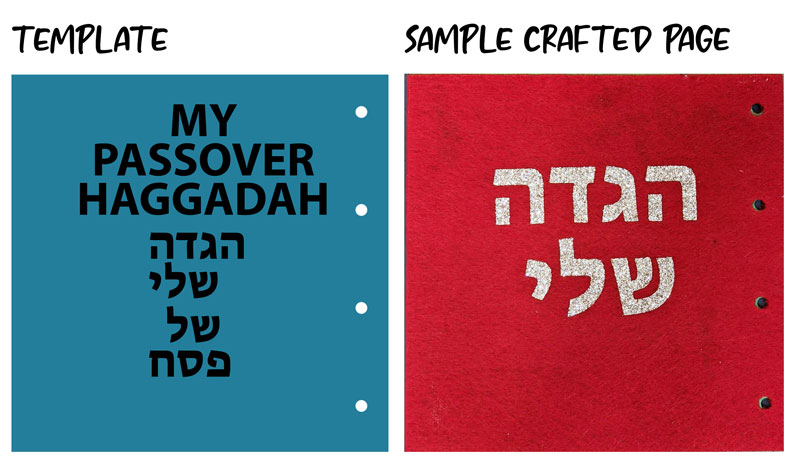
I kept the cover simple. The template offers English text (My Passover Haggadah). You can leave off the “My”. In Hebrew you have the option of doing “Haggadah sheli” – My Haggadah or “Haggadah shel Pesach” – Passover Haggadah. I chose Haggadah sheli and enlarged the letters a little bit.
Kadesh

A glass of “wine” (grape juice) is poured, a blessing is made, and each participant drinks their glass. I used silver to make a shiny kiddush cup.
I used foil tape for this one. I do NOT recommend this as it’s too flimsy. You’d be better off using silver foil backed on cardstock, or cutting cardstock and then wrapping it with foil or painting it silver.
You can also use silver poster board.
The grape juice is cut from a plastic divider and the hand from stiff felt. The hand is attached using a brad so that it can lift the cup. The cup is attached to the background and the hand with hook and loop.
Urchatz

Urchatz is when the hands are washed without making a blessing. The hands are cut from soft felt.
The cup is cut from silver holographic paper and the backing from aluminum foil tape. I recommend using something stiffer, as I did later in the assembly process.
The water is cut from a blue plastic divider. The hands are attached with a brad and the cup with felt so that kids can lift up the cup and “wash” the hands.
Karpas
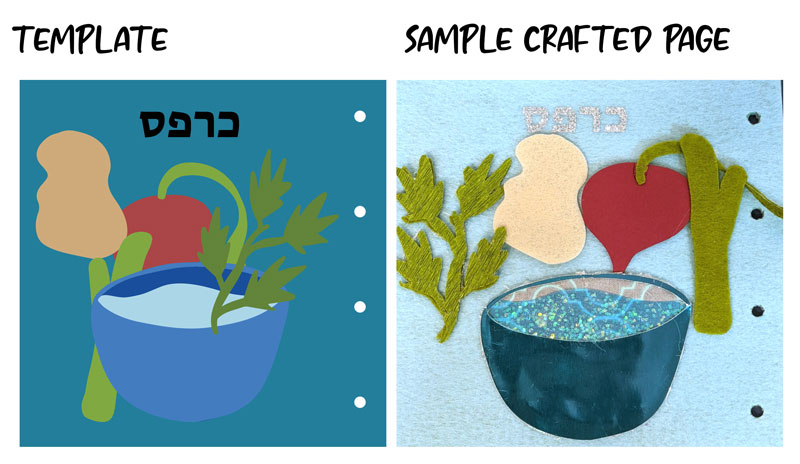
When I designed Karpas, I wanted each child to practice the custom familiar to them. So I made four common foods used for Karpas: parsley, potato, radish, and celery.
Choose the vegetable(s) you want to cut and disable the rest! I don’t recommend doing all like I did! The parsley is crepe paper backed on felt. The potato is stiff felt. The radishes cardstock and felt. The celery is stiff felt.
The back of the bowl is fabric. The front is foil poster board. The salt water is blue divider with some texture added.
I attached the water to the front of the bowl, leaving it open for children to actually dip things behind the water.
Yachatz
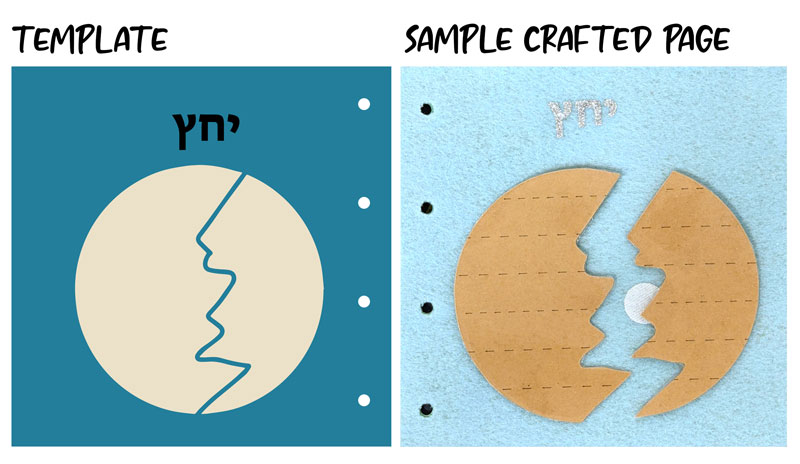
Yachatz is one of my favorite parts of the seder! The kids love it, it’s stress-free, and lots of fun.
I created a matzah and made a crack down the middle. I used kraft board for this matzah and laminated it with clear contact paper.
The matzah is attached with two hook and loop dots so that it can be presented with the matzah “whole” and then kids can break it and separate them in the book.
Maggid
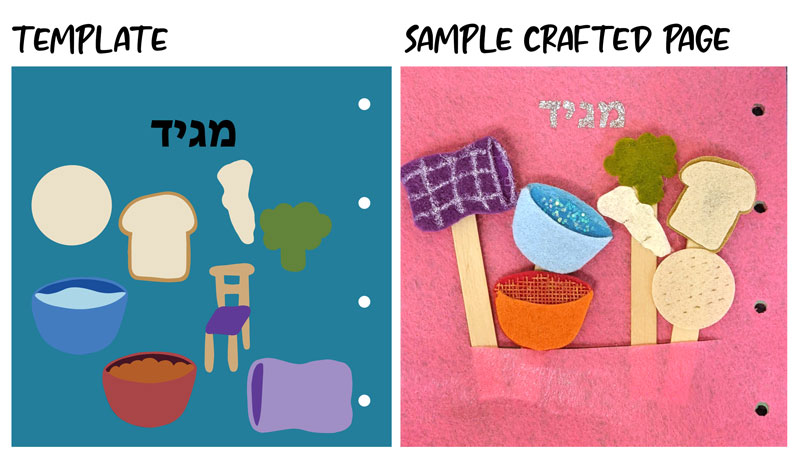
What a dilemma it was to decide what to include for all the details of Maggid! I decided to choose the part that most involves the youngest family members: the four questions.
You can put these on craft sticks, as I did, if you want kids to be able to use them as puppets to “show” the questions. Or, just attach them with hook and loop. You can be creative with these! I included another idea in the printable instructions that comes with your template.
The “puppets” are made from assorted materials (more details in the printable) are secured to the background with hook and loop so they don’t get lost. The pocket is simply a slit in the felt that I cut.
Rachtzah

Rachtzah is very similar to Urchatz only here, I used two tones of metallic poster board for a much sturdier washing cup. I also placed the hands in opposite directions and it looks much better.
For the speech bubble with the blessing (a blessing is made on this hand washing, as opposed to by urchatz) I tried something new. I turned the letters into a “deboss” operation type and attached it to the bubble. I debossed it on craft foam. I included more ideas for lettering in the printable instructions.
Motzi Matzah
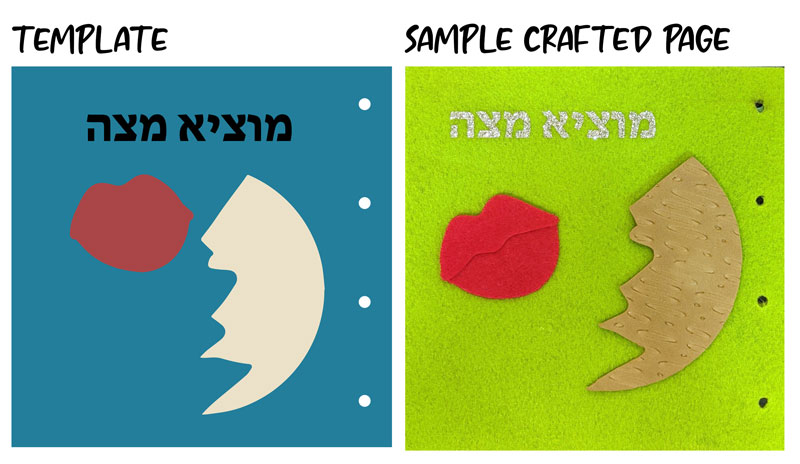
Motzi Matzah is very simple: kids simply feed the matzah to the mouth. A loves it and tries feeding it to me!
The mouth is two layers of red foam (the template is also two layers as pictured in the completed project).
For this matzah, I tried something new! I loved the idea of debossing craft foam so I added a texture. You can simply use a marker to draw on texture, use Matzah paper, or leave it plain.
Marror
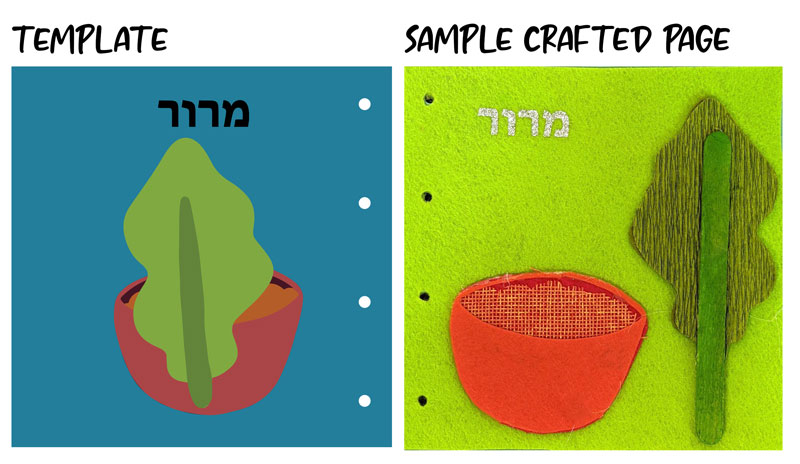
Marror is another favorite, ironically!
The bowl is made of two shades of felt. The charoset is a scrap of orange burlap I had handy (of course, you can just use felt). The edge didn’t cut in a distinct ruffle on burlap due to its open weave. I finished it with Mod Podge to prevent fraying.
The charoset is again glued to the front bowl with the top open so that you can actually dip your marror.
The marror is crepe paper backed on felt. I skipped the cut for the stalk and used a craft stick instead.
Korech
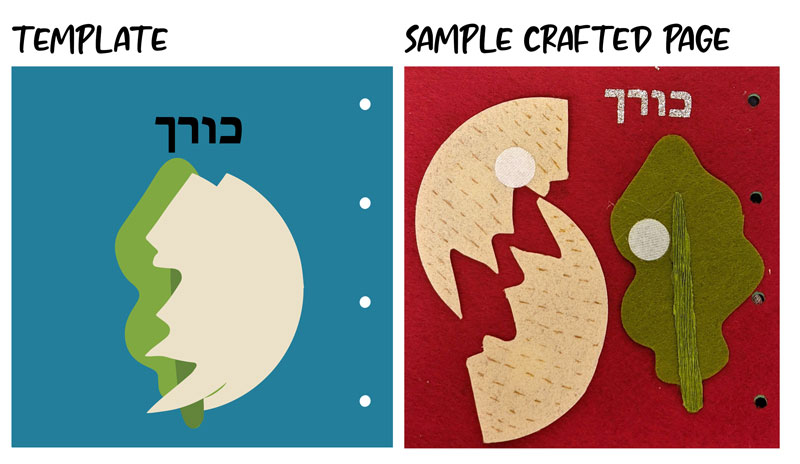
For Korech, I used stiff felt for my matzahs and drew on dashes. The marror is made from stiff felt with a crepe paper stalk.
On this one, kids can use the hook and loop to create their own sandwich. All the parts are secured to the background with hook and loop. The parts that need it also have hook and loop on top. My boys absolutely loved this page and pretended to “eat” it.
Shulchan Orech
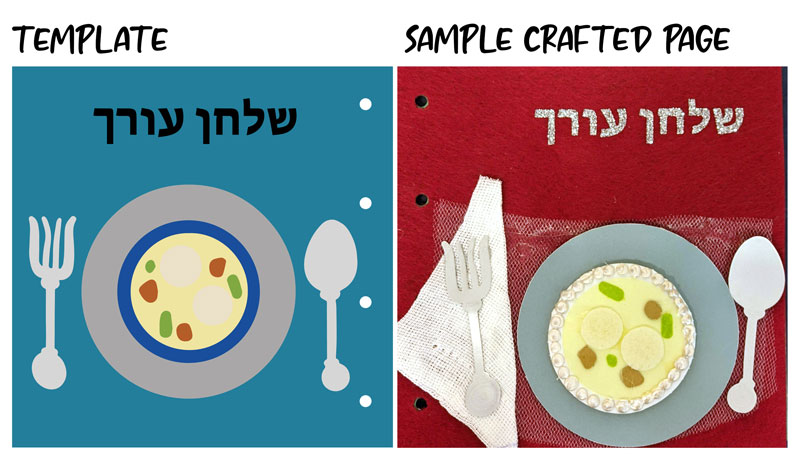
The meal is eaten! Featuring a bowl of Matzah ball soup!
I chose this dish as it’s probably universally the most popular dish at a Passover Seder, and the one people make it to before they fall asleep on the couch. Create your soup with or without the matzah balls – you can leave that out if you don’t eat gebroks. If you typically create egg noodles, you can add that using strips of yellow felt or shredded paper.
I added a lot of detail here with things I had handy, as you can see.
The soup is cut from a yellow plastic divider. Because it’s transparent, I opted to make the bowl white instead of the blue in the template. I glued the vegetables (paper tape and kraft board) to the bowl. I placed the soup on top and then the matzah balls (felt) over the soup to create a realistic order.
Tzafun
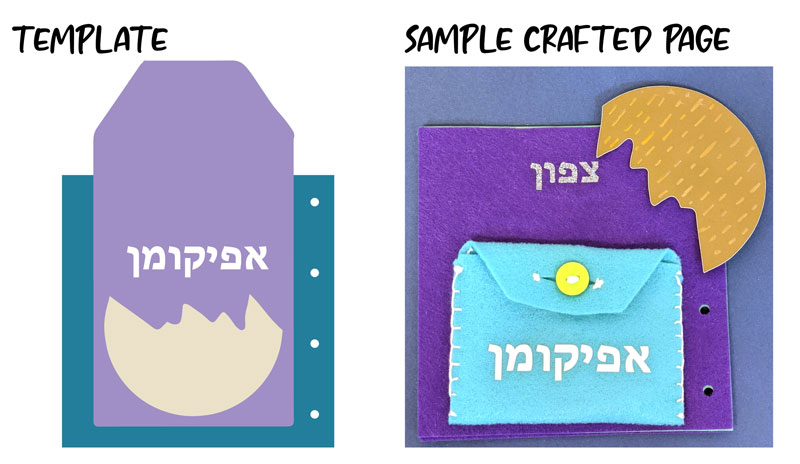
Tzafun showcases how you can use this sensory Haggadah template to mkae standalone crafts too! The long rectangle with the tab at the top is to make an actual pouch to add to your busy book. That’s why it’s longer than your page – you need to fold it into an envelope.
I cut a slit and tied on a button to add some variation to this sensory Haggadah. You can, of course, use hook and loop.
The lettering is white iron-on.
The matzah is metallic poster board in a bronze shade with dashes drawn on.
Barech
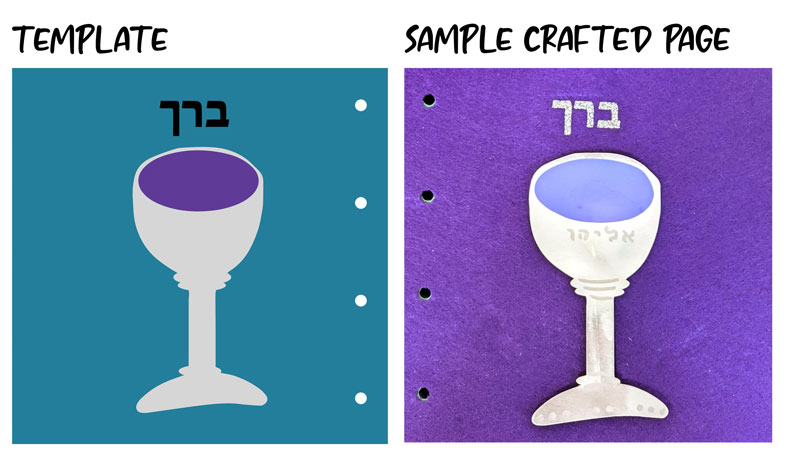
When I first designed this, I made it with a “bencher” prayer book to say birkat hamazon as that’s what the bulk of barech is. However, it was literally just rectangles. I wanted to add more value to the template. So while you can cut a few rectangles yourself and compile a prayer book, I decided to make an “Elijah’s cup” since that’s a part of the seder that even the very young participate in.
This is a bit more elaborate than on the Kadesh cup, and I decided to add additional details. I wrote Eliyahu on mine in Hebrew and added some lines and dots with a silver marker.
Hallel
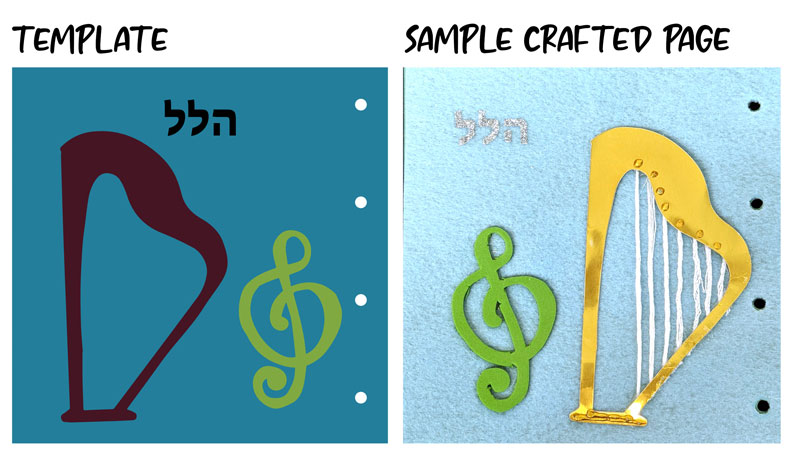
For Hallel you have a harp for King David’s musical instrument of choice and a musical note. I glued these elements on as they are more delicate, it comes later in the seder, and it offers lots of sensory touch aspects.
For the harp, I used foil poster board in gold. I used puffy paint to add dots and dimension. I hot glued embroidery floss to the back and trimmed it.
The musical note is craft foam.
Nirtzah
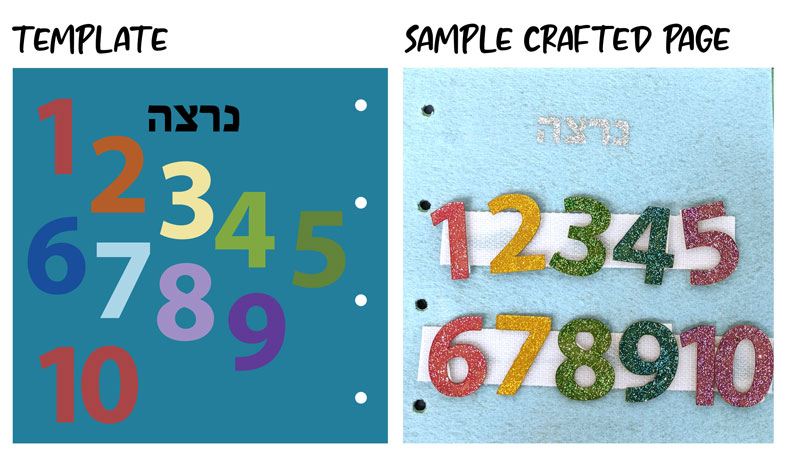
Finally, for Nirtzah, I chose to highlight the song “Echad mi yodei’a” – Who knows one?
It’s just so age appropriate for the target age of this Haggah!
I glued itty bits of hook and loop to the backs of the numbers and placed strips on the page itself. This way kids can really play around with the order. I used numbers 1-10 due to space considerations. If you want to go until thirteen, like the song itself, simply duplicate the numbers you need.
Putting it all together
I cut an extra two felt pages and one cardstock page to use as a back cover.
To assemble it, I used mod podge to secure each page to the core cardstock page.
To bind my book, I used ⅛ inch satin ribbon. I threaded it on a large upholstery needle to make stringing up the pages easier. After tying and trimming each ribbon, I added a dot of hot glue to the center knot to keep it very secure.
Check out my list of potential and suggested supplies you can use here.
Need more explanation and insight into the Seder? Check out Chabad’s article on what is a Seder?
Also check out my Seder plate template add-on (or standalone). I glued this to the inside cover of my Haggadah. If you want a simpler option for a Haggadah for kids, try the Do a Dot printable Haggadah for young kids
And finally, if you loved this, you’ll love my Passover card game!
The post Sensory Haggadah Template – an Interactive Quiet Book! appeared first on Jewish Moms & Crafters.