My favorite puns are the really intellectual ones, where you have to have specific, often esoteric knowledge to get the joke. I'm sure that I miss many of them completely as they go over my head, but that only makes the ones I do get all the more satisfying. It's like a little reward knowing that you're educated enough (in at least one specific area) to understand an intellectual pun.
The first time I remember really appreciating a pun was around 1st or 2nd grade, when I discovered The King Who Rained (affiliate link here and below). I laughed out loud in our silent school library, checked out the book, and laughed about it every time I thought about it. I checked that book out at least a dozen times over the rest of my elementary school career. I was also a huge fan of Amelia Bedelia. We had a Japanese exchange student and her teacher stay with us when I was 8 and they LOVED those books. Getting the joke in a language you're learning must be even more satisfying than in your native language.
Back in my teaching days, my students loved discovering a punny book in our class library that they hadn't previously understood. Like when we would first encounter circumference in the math book... one year, a student yelled, "Hey!" and ran giggling to the class library to pull out these books, super pleased with himself to finally get the joke. That totally made my day. It's an amazing feeling to see kids not only learning, but making a strong enough connection with material to understand a pun.
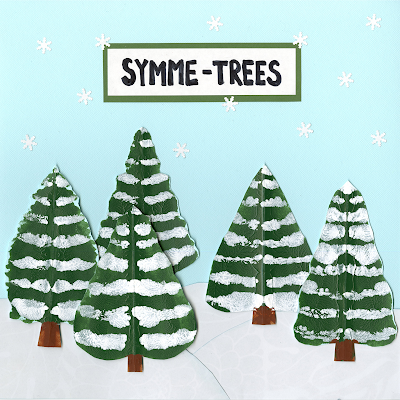
I was thinking of those kids when I made these Symme-trees. Naturally, they go perfectly with a math lesson about symmetry. Wouldn't a whole bulletin board of them look great?
Winter Symme-trees
Materials:
Steps:
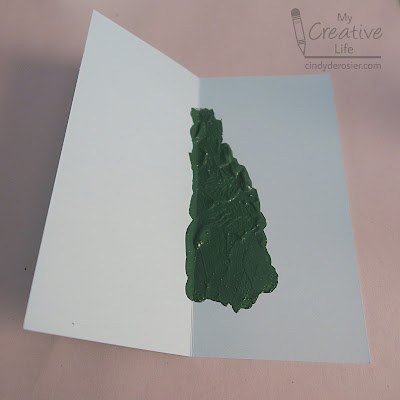
Set aside one sheet of light blue cardstock. Cut the other sheet into six pieces, each approximately 4" x 6". Use the scoring board to make a fold line down the center of each. Add green paint to the right-hand side of each piece, vaguely forming the shape of half a tree. Start with a conversative amount of paint. You can add more, but can't remove it.
Fold the paper along the scored line, pressing the paint onto the other side. Open up the paper; if you're happy with the tree, set it aside to dry and move on to the next one. If there wasn't enough paint, just add more on the right side and press again.
Let all six trees dry completely. When they are dry, add horizontal swaths of white paint to mimic snow. Fold and press. Again, you can add more paint in it doesn't transfer well.
When the white paint is dry, add brown for the trunk. Let all the paint dry completely, then fold the trees the opposite direction, so that the paint is facing out. Carefully cut around each tree.
Cut the white cardstock into snowy hills. Ink the edges with pale grey ink, then glue them to the background paper. You can glue your trees directly to the background paper too, but I used foam tape to pop them up and add extra dimension. It's hard to tell in the scanned image, but it makes a big difference in person. Finally, decorate with snowflakes. Adding a "SYMME-TREES" title is optional.
If I were making these in the classroom, I'd follow up with challenging the students to think of tree puns to work into a story or other piece of creative writing. I would love to cedar clever ideas... fir sure!


